In this blog post we'll look at how easy it is to make internal web applications available to authenticated and authorized users without needing a VPN. It's easy and will take you just 1 minute!
Many organizations have web applications located in private networks that need to be available at times to the right folks. Examples may include:
- An internal application protected by a strict firewall or NAT.
- A static S3 website, only available from a private VPC.
- An IOT device in a customer's environment.
- Even your Raspberry Pi at home behind NAT.
In all cases these applications are hosted in restricted networks because they contain sensitive data that need to be protected, and as a result, we don't want these to be exposed to the whole Internet. However, this creates friction when accessing the application, as you need to be on the same network, on some trusted IP range, or on a VPN.
There are various challenges with this. Trusted IP ranges should generally be avoided, as it's a poor proxy for authentication and authorization. It merely proves that you were able to get on the network (legitimately or not), but says little about who you are and if you should have access to the application (authorization). Finally, using VPNs all day can be challenging for users. Or in the IOT case, it may be impossible to have VPN servers at each location.
Meet Border0
What if we could access these internal web applications with the same experience as any other website as if it's just connected to the Internet? While still getting a high level of security. I.e. not directly exposing the application to the Internet and with strict identity-aware filters. Ie. Low friction AND increased security. Sounds good, right? Let's dive in and walk through how this can be achieved using Border0!
A simple getting started example
In this example, we have an internal App, in a private network, behind various levels of NAT. We're going to make this web Application available to authenticated and authorized users only.
I'll start with a simple example from my laptop. After logging in to border0 (border0 login), I'll create a new HTTP service called my-internal-app.
Then connect it to the Border0 cloud. I'll use the Border0 built-on web server to start.
That’s it! Now I'm able to access it.

Note that I used the internal web server, which by default serves up the page above, which is great for testing. If you have files you'd like to share or an HTML docs directory, you can use that too. In that case, start the internal web server like the example below, and point to the html directory.
Making an internal web application available.
Now let's take a look at making an existing application available. This is very similar to the example above, but instead of using the built-in web server, we'll point it to an existing web server.
Let's say the internal app is called orders.internal.corp.com, and its IP address is 10.10.10.10, i.e., a private IP address. First, let's create a new Socket (service) for this. Since the target web service listens on HTTPS, we'll set the SNI and Host header correctly using the upstream_http_hostname flag.
Ok, now it's time to connect this Socket to the Border0 cloud
(note, this needs to be run from a machine that has access to the 10.10.10.10 IP address. This can be the host itself or something on the same private network)
We should now be able to visit the internal app using the following URL:
https://internal-orders-demo.border0.io
🤔 Curious what it looks like? Check out this video for the demo
💡 We also support custom DNS names; please see our documentation here for the two simple steps to do that.
Who has access?
Great question! This is an internal application, so we must only provide access to the application to those who should have access!
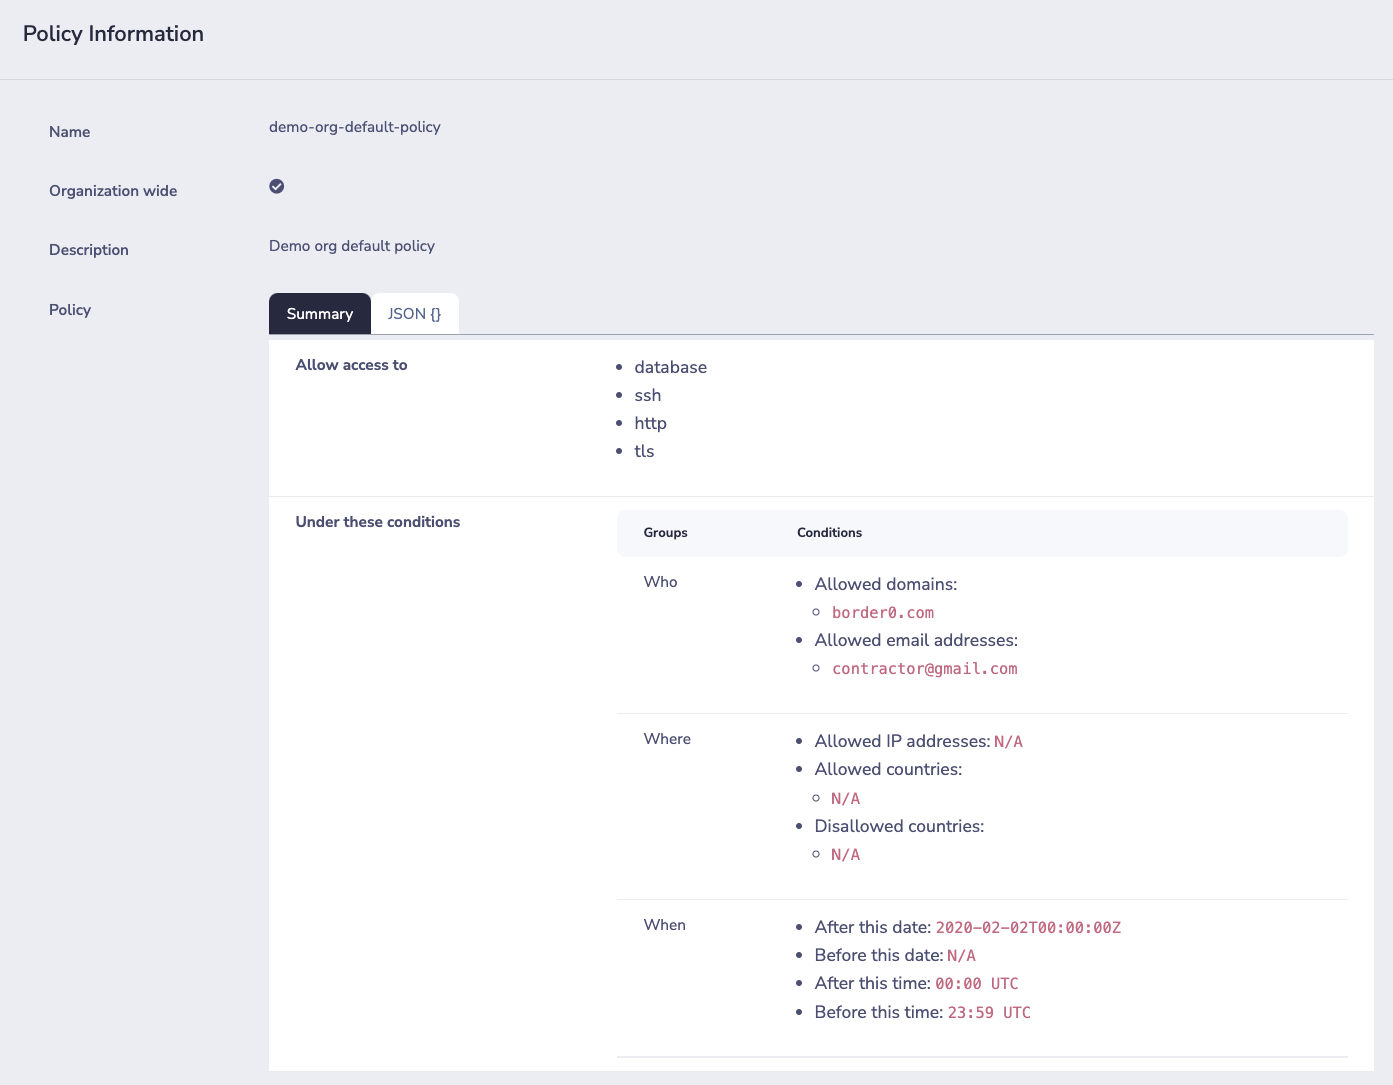
This is controlled by policies; these control who has access, when, from where, and what they're allowed to do.I
In this example, we kept things simple and didn't explicitly attach a policy to the Socket. Instead, we're using the default organization-wide policies.
The example below shows a basic policy that provides access to anyone that authenticates with a border0.com email, or the 3rd party contractor: contractor@gmail.com
Since we want to keep it simple, we're not filtering based on IP or Geo. We also allow folks to log in any time of day.
Detailed Session logs
Last but not least, we also get to see exactly who accessed our internal web application.
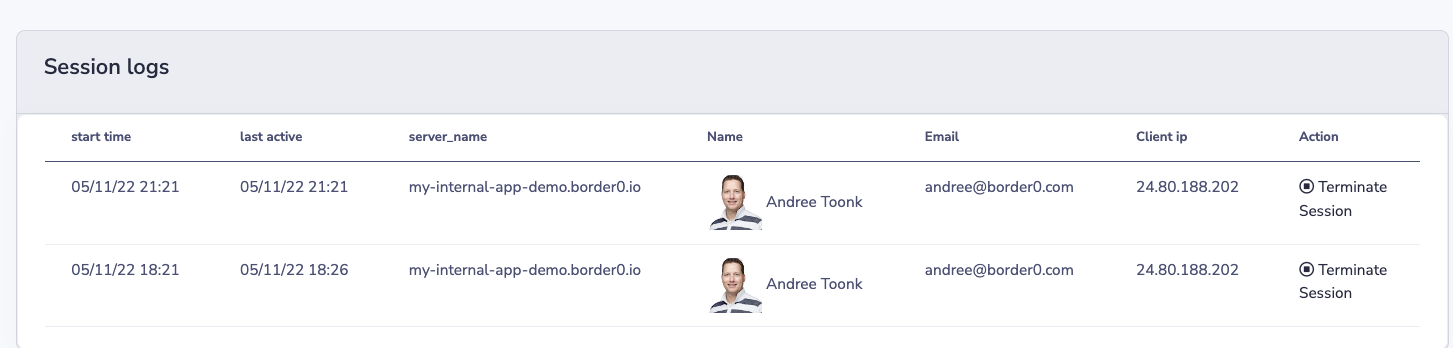
This is important, as it allows us to see who accessed what resource, when, and from where. Notice that this is different from, say flow logs, as it includes the actual identity of the users accessing your application.
Relaying user info to the internal App
For the internal app, it is helpful to know what user (who) is making the HTTP requests. We make that information available to the internal Application by adding the following extra headers to the upstream request.
With this information, the internal Application knows who's making the request and can make its own application-specific authorization decisions.
Wrap up
Using Border0 it's easy to make private HTTP, SSH, and Database resources available. In this blog post, we looked at how easy it is to make a private HTTP application available through Border0. We saw that we didn't need a VPN or any special client other than your browser. From a user perspective, it felt like visiting any other website, even though the app sits in a protected network that doesn't allow inbound connections. We also observed that the web application itself did not support authentication natively, yet we were able to quickly provide authentication and authorization using the Border0 built-in authentication and policy service.
Finally, we could see exactly who visited the web application, when, and from where.
This should work for any web app, and Border0 customers use it for IOT devices, Internal business applications in private VPC's, Raspberry Pi at home, and more.
Hopefully, this demonstrated how easy it is to get started with Border0. Do you have an app you'd like to make available or experiment with? We invite you to give it a spin yourself and sign up for our free, fully-functional community edition here!


.png)

.png)

Ready to level up
your security?